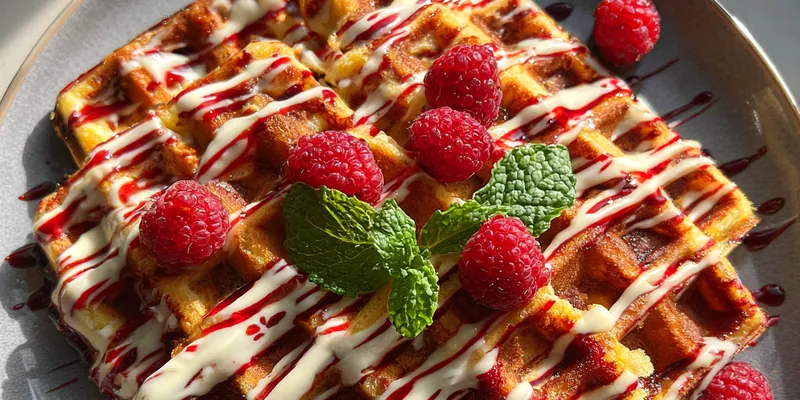
Red Velvet Marble Waffles
Red Velvet Marble Waffles bring a beautiful blend of flavors and colors to your breakfast table. Perfectly fluffy and rich, they're a delightful twist on traditional waffles. The vibrant red color paired with creamy hints from the cheese makes these waffles a feast for both the eyes and the taste buds. Ideal for special occasions or a fun breakfast treat!

Why This Red Velvet Marble Waffles Recipe Works
This recipe stands out because it beautifully marries the rich flavors of red velvet with the classic texture of waffles. The vibrant color not only makes these waffles visually appealing but also enhances the dining experience. The combination of cocoa and cream cheese adds depth to the flavor profile, ensuring that each bite is a delightful surprise.
The technique of marbling the batters not only creates a stunning effect but also keeps the waffles light and fluffy. Utilizing buttermilk adds moisture, while the baking powder ensures they rise perfectly. Each waffle is cooked to a crisp golden brown, providing that satisfying crunch upon biting into it.
💡 Professional Tip
For an extra level of flavor, consider adding a pinch of cinnamon to the batter. This little touch can help elevate the overall taste. Additionally, ensure your waffle iron is adequately preheated to achieve the perfect crispy exterior.
Frequently Asked Questions
Yes, you can prepare the batter ahead of time and store it in the refrigerator for up to 24 hours. When ready to cook, just give the batter a good stir before pouring it into the waffle iron. However, freshly made waffles will always taste best!
If you don't have buttermilk on hand, you can easily make a substitute by mixing one cup of milk with one tablespoon of vinegar or lemon juice. Let it sit for about 5-10 minutes until it thickens slightly. This mixture will provide the necessary acidity to help the waffles rise.
Waffles are typically done when they are golden brown and crisp on the outside. If your waffle iron has a light indicator, it can help you determine the cooking time. If not, check them after 4-5 minutes and adjust the time according to your waffle iron's specific instructions.
Absolutely! You can freeze cooked waffles by placing them in a single layer on a baking sheet until frozen solid, then transferring them to a freezer bag or container. They can be reheated in a toaster or oven for a quick breakfast treat later.
These waffles pair beautifully with a drizzle of maple syrup, whipped cream, or fresh fruit like strawberries and blueberries. For an extra indulgent touch, serve them with a dollop of cream cheese frosting or a scoop of vanilla ice cream.
Stored in an airtight container, Red Velvet Marble Waffles will last about 3-4 days in the refrigerator. Reheat them in the toaster or microwave for a quick breakfast or snack.
Yes, you can make the batter ahead of time and keep it in the fridge for up to a day. You can also cook the waffles in advance and store them in a refrigerator or freezer. Just reheat them when you're ready to serve.
To reheat waffles, the toaster is the best option as it will restore their crispiness. Alternatively, you can warm them in the oven at a low temperature (about 350°F) for 10-15 minutes. Avoid microwaving as it can make them soggy.
Recipe Troubleshooting Guide
Too Dry
Problem: Waffles come out too dry and crumbly.
Solution: Ensure you are measuring your flour accurately and not packing it into the cup. Adding more buttermilk can also help retain moisture in the batter.
Not Crispy Enough
Problem: Waffles lack the desired crispiness.
Solution: Make sure your waffle iron is hot enough before pouring in the batter. For extra crispiness, you can also try using a bit less batter per waffle.
Overcooked
Problem: Waffles turn out too dark and dry.
Prevention: Check your waffle iron's cooking time settings, as they may differ from others. Make adjustments to avoid overcooking and always remove them once they reach golden brown.
Undercooked Center
Problem: Waffles are cooked on the outside but raw in the middle.
Recovery: Make sure you are not overfilling the waffle iron, as this can lead to uneven cooking. If this happens, lower the heat setting and let them cook a little longer.
Burnt Exterior
Problem: Waffles have a burnt outer layer.
Prevention: Lower the temperature setting on your waffle iron and keep an eye on the cooking time. It may help to preheat the iron less, allowing for a gentler cooking process.
Flavor Balance
Too Sweet: If the waffles are too sweet, reduce the sugar in the batter next time or serve with less syrup.
Too Salty: If you find them too salty, reduce the amount of salt in the batter during preparation.
Bland: If the waffles are bland, consider adding more vanilla extract or a pinch of cinnamon to enhance the flavor profile.
Essential Ingredients for Red Velvet Marble Waffles
The main ingredients for Red Velvet Marble Waffles include all-purpose flour, cocoa powder, and red food coloring. Each component plays a vital role in achieving the perfect texture and flavor. The flour provides structure, while cocoa brings a rich chocolate taste, and food coloring is essential for that classic red hue.
Using high-quality cocoa powder is crucial for depth in flavor. Opt for Dutch-processed cocoa for a smoother taste. Fresh ingredients, such as eggs and buttermilk, are also important to ensure the best possible results; they enhance moisture and richness in the waffles.
Essential Ingredient Notes
- All-Purpose Flour: Choose a good quality all-purpose flour for the best structure in your waffles. Avoid using cake flour as it may make them too soft and delicate.
- Cocoa Powder: Select high-quality cocoa powder to ensure a rich chocolate flavor. Dutch-processed cocoa will yield a smoother taste compared to natural cocoa.
- Red Food Coloring: For the best color, use gel food coloring instead of liquid. Gel food coloring provides a more vibrant hue without altering the batter's consistency.
Step-by-Step Cooking Process
The cooking process for Red Velvet Marble Waffles is straightforward and fun. Start by preparing your batter, ensuring that both the red and plain mixtures are ready for marbling. Preheating your waffle iron is essential for even cooking and achieving that perfect crispy exterior.
As you pour the batters into the waffle iron, alternate between the red and plain mixtures to create beautiful swirls. Cooking until golden brown ensures that the waffles are fluffy inside. Enjoy the satisfaction of seeing the marbling effect once they're plated.
Key Technique for Perfect Red Velvet Marble Waffles
The secret to achieving those perfect marbled layers lies in how you pour the batter into the waffle iron. Start with a spoonful of one color, followed by a spoonful of the other, and continue to alternate. This method creates the eye-catching design while ensuring an even distribution of flavors.
Red Velvet Marble Waffles
📋 Ingredients
Main Ingredients
- 1 cup butterRoom temperature
- 2 cups powdered sugarSifted
- 1 teaspoon vanilla extractFor flavor
For the Sauce
- 2 cups all-purpose flourFor the batter
- 1 tablespoon baking powderFor leavening
- 1/2 teaspoon baking sodaFor leavening
- 1/2 teaspoon saltFor flavor
- 1/4 cup cocoa powderFor chocolate flavor
- 3 tablespoons red food coloringFor color
- 2 large eggsFor binding
- 1 1/2 cups buttermilkFor moisture
- 1/2 cup vegetable oilFor richness
- 1 teaspoon vanilla extractFor flavor
- 1/2 cup sugarFor sweetness
- 1/2 cup chocolate chipsFor added flavor
Instructions
Prepare the Batter
In a large bowl, whisk together the flour, baking powder, baking soda, salt, and cocoa powder.
Mix Wet Ingredients
In another bowl, combine the eggs, buttermilk, vegetable oil, sugar, and vanilla.
Combine Mixtures
Pour the wet ingredients into the dry ingredients and mix until just combined.
Color the Batter
Divide the batter in half; mix red food coloring into one half.
Prepare Cream Cheese Mixture
In a small bowl, mix cream cheese, powdered sugar, and vanilla until smooth.
Preheat Waffle Iron
Preheat your waffle iron according to manufacturer instructions.
Cook Waffles
Pour alternate scoops of the red and plain batter into the waffle iron to create a marbled effect.
Serve Immediately
Serve the waffles warm, drizzled with the cream cheese mixture and topped with chocolate chips.
Recipe Notes & Tips
Storage Tips
To maintain freshness, store leftover waffles in an airtight container in the refrigerator. They can last for about 3-4 days. For longer storage, consider freezing them as mentioned earlier.
Serving Suggestions
These waffles are best served warm with toppings like whipped cream, fresh fruits, or a drizzle of chocolate syrup. They make for an excellent brunch item or special occasion treat.
Recipe Variations
For a twist, consider adding nuts or fruits to the batter. You can also make a gluten-free version by using almond flour or a gluten-free flour blend. For a richer taste, try adding dark chocolate chips instead of regular ones.