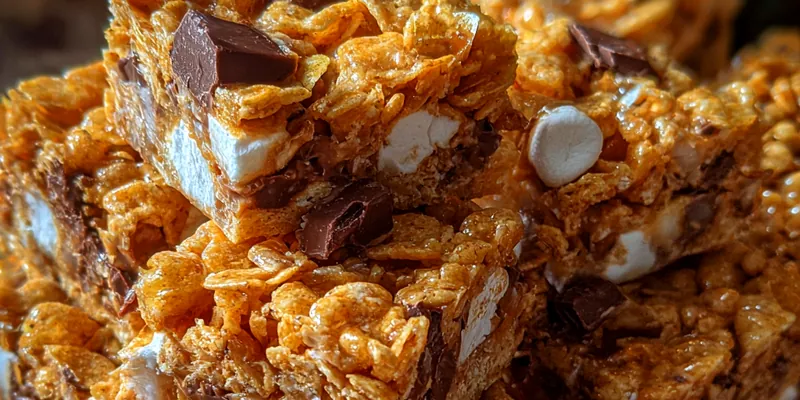
Golden Graham Chocolate Bars
Golden Graham Chocolate Bars are a delightful treat that combines the nostalgic flavor of Golden Graham cereal with rich chocolate and creamy peanut butter. These bars are no-bake, making them an easy dessert option perfect for any occasion. Whether you're hosting a party or just craving something sweet, these bars are sure to impress everyone. Enjoy the crunch and sweetness in every bite!

Why This Golden Graham Chocolate Bars Recipe Works
This recipe works because it combines simple ingredients to create a delightful balance of flavors and textures. The Golden Graham cereal adds a unique crunch, while the melted chocolate provides a rich and creamy finish. This no-bake approach means you can whip up a batch without the hassle of turning on the oven, making it a go-to for quick snacks.
The technique of melting the ingredients together ensures that every bite is perfectly coated and flavorful. By refrigerating the bars, they set into a firm yet chewy texture that holds up well. This combination of ease and taste makes it a favorite for both children and adults alike.
💡 Professional Tip
For an extra decadent treat, consider adding a layer of caramel or using different types of chocolate like white or milk chocolate. Just ensure you allow each layer to set before adding the next. This will enhance the flavor profile and create a more complex dessert.
Frequently Asked Questions
Absolutely! These bars can be made a day in advance and stored in the refrigerator. Just make sure to keep them in an airtight container to maintain their freshness. They actually taste even better after chilling overnight as the flavors meld together.
If you're allergic to peanut butter or prefer an alternative, you can use almond butter, sunbutter, or even a seed butter. Each will give a unique flavor, but they all work well in this recipe. Just make sure the consistency remains similar for the best results.
Since this is a no-bake recipe, the bars are 'done' once they are firmly set in the refrigerator. You can check by gently pressing the surface; it should feel firm but not hard. Once they hold their shape when cut, they're ready to enjoy!
Yes, these bars can be frozen! Just wrap them tightly in plastic wrap or place them in an airtight container before freezing. They can last up to 2 months. To enjoy, simply thaw them in the refrigerator for a few hours before serving.
These bars pair wonderfully with a glass of milk or a scoop of vanilla ice cream. You can also serve them alongside fresh fruit for a refreshing contrast. They make a great addition to any dessert table at parties!
In the refrigerator, these bars can last up to a week when stored properly in an airtight container. They may start to lose some texture after a few days, but they'll still be delicious and enjoyable for several days.
Yes, making these bars in advance is a great idea! They can be prepared and stored in the fridge for up to a week. This makes them perfect for meal prepping or having snacks on hand for unexpected guests.
If you prefer them warm, you can gently reheat them in the microwave for about 10-15 seconds. Make sure to do it in short intervals to avoid melting the chocolate too much. Enjoy them warm for a melty treat!
Recipe Troubleshooting Guide
Too Dry
Problem: If your bars turn out too dry, it may be due to not enough binding ingredients.
Solution: Try adding a bit more peanut butter or honey to the mix to help bind the cereal and chocolate together better. This should create a more cohesive texture.
Not Crispy Enough
Problem: If the bars are not as crispy as expected, it could be because they were pressed down too hard.
Solution: Be sure to gently press the mixture into the pan without compacting it too much. This allows for air to remain in the bars, keeping them crunchy.
Overcooked
Problem: If the mixture was overheated, it could lead to a gritty texture.
Prevention: Always melt the ingredients on low heat and remove from heat as soon as everything is melted and smooth. Stir continuously to avoid burning.
Undercooked Center
Problem: If the center isn't setting properly, it may be due to not chilling long enough.
Recovery: Ensure to refrigerate the bars for at least 30 minutes or until fully set. If needed, you can leave them in longer for a firmer texture.
Burnt Exterior
Problem: If the outer layer of chocolate is burnt, it may have been melted at too high a temperature.
Prevention: Melt chocolate over a double boiler or carefully in the microwave at low power to prevent burning. Stir frequently to keep an eye on the melting process.
Flavor Balance
Too Sweet: If the bars are too sweet, add a pinch of salt to balance the flavors.
Too Salty: If they are too salty, consider adding more chocolate to offset the flavor.
Bland: If the bars taste bland, a splash of vanilla or a sprinkle of cinnamon can enhance the overall flavor.
Essential Ingredients for Golden Graham Chocolate Bars
The key ingredients in this recipe include Golden Graham cereal, which provides a delicious crunch, and chocolate, which brings a rich sweetness. Peanut butter not only adds flavor but also acts as a binding agent, making these bars satisfying. Each ingredient plays a critical role in achieving the perfect taste and texture.
Using high-quality chocolate and fresh marshmallows can elevate your bars. Opt for natural and organic ingredients whenever possible to ensure you're enjoying a wholesome treat. The combination of textures from the crunchy cereal and smooth chocolate makes every bite irresistible.
Essential Ingredient Notes
- Golden Graham Cereal: Choose a fresh box of Golden Graham cereal for the best flavor and crunch. Stale cereal can lead to soggy bars, so check the expiration date before using.
- Chocolate Chips: Using semi-sweet chocolate chips provides the perfect balance of sweetness. You can also experiment with dark or milk chocolate for different flavor profiles.
- Peanut Butter: Opt for a natural peanut butter that doesn’t contain added sugars or oils. This will give the bars a creamier texture and enhanced flavor without unwanted additives.
Step-by-Step Cooking Process
This no-bake recipe simplifies the cooking process while still delivering a delicious treat. By melting the ingredients together, you create a cohesive mixture that is easy to work with. The key is to ensure everything is well combined and evenly distributed throughout the cereal.
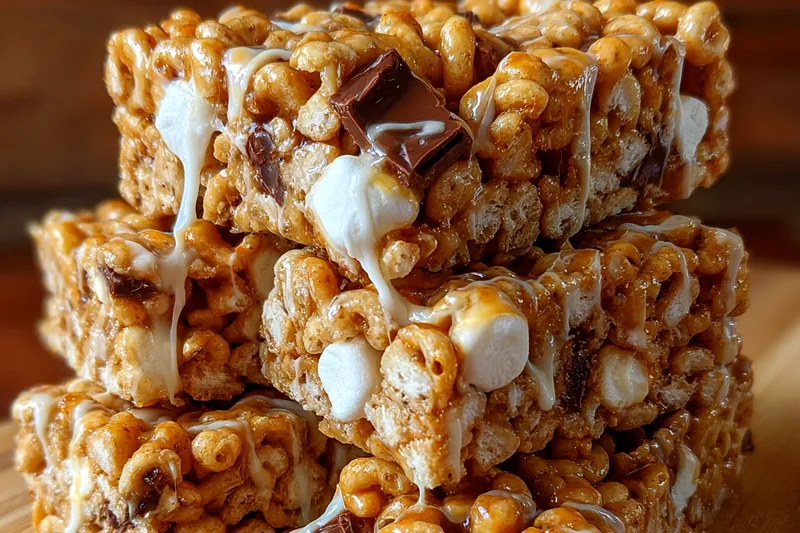
To achieve perfect results, allow the bars to chill completely in the fridge. This not only helps them set but also enhances the flavors. The final drizzle of chocolate adds a professional touch, making your homemade bars look and taste amazing.
Key Technique for Perfect Golden Graham Chocolate Bars
The critical technique for ensuring your Golden Graham Chocolate Bars turn out perfectly is in the melting process. Melt the butter and peanut butter gently to avoid burning, then mix thoroughly with the chocolate. This ensures a smooth consistency that coats the cereal well, leading to a deliciously crunchy treat.
Golden Graham Chocolate Bars
📋 Ingredients
Main Ingredients
- 1 cup butterRoom temperature
- 1/2 cup honeyNatural sweetener
- 1/2 cup peanut butterSmooth or crunchy
- 1 teaspoon vanilla extractFor flavor
- 1/4 teaspoon saltEnhances flavor
For the Sauce
- 1 lb Golden Graham cerealCrunchy base
- 1 cup semi-sweet chocolate chipsMelts easily
- 1 cup mini marshmallowsAdds sweetness
- 2 cups additional chocolate for drizzlingFor topping
- 1 cup chopped nuts (optional)For crunch
- 1/2 cup shredded coconut (optional)Adds texture
Instructions
Prepare the Pan
Grease a 9x13 inch baking pan with cooking spray to prevent sticking.
Melt the Base
In a saucepan over low heat, combine the butter, peanut butter, honey, and vanilla extract until melted and smooth.
Mix in Cereal
Remove from heat and stir in the Golden Graham cereal until fully coated.
Add Chocolate and Marshmallows
Mix in the chocolate chips and mini marshmallows until evenly distributed.
Press into Pan
Pour the mixture into the prepared baking pan and press down firmly with a spatula.
Chill the Bars
Refrigerate for at least 30 minutes to set.
Melt Additional Chocolate
Melt the additional chocolate and drizzle over the top of the set bars.
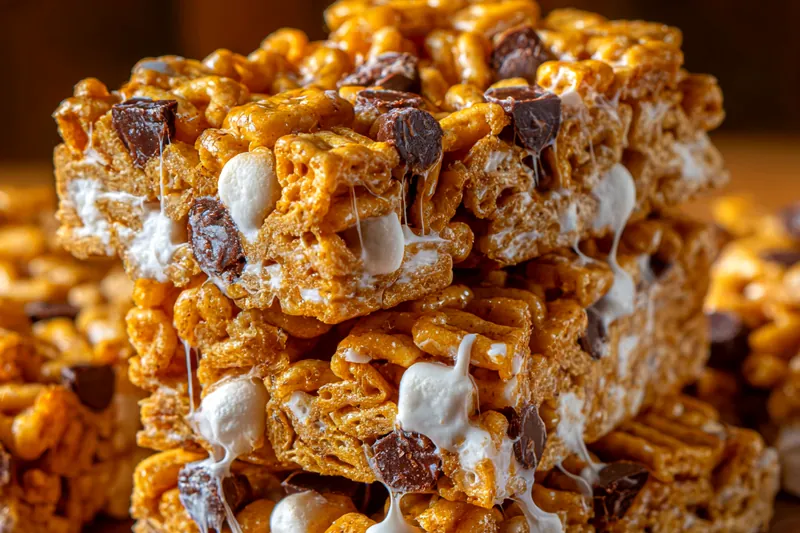
Cut and Serve
Once the chocolate has set, cut into squares and serve.
Recipe Notes & Tips
Storage Tips
Store the Golden Graham Chocolate Bars in an airtight container in the refrigerator for up to a week. For longer storage, consider freezing them wrapped tightly in plastic wrap.
Serving Suggestions
Serve these bars at room temperature for the best texture. They are perfect for parties, school lunches, or as an after-dinner treat. Pair them with a glass of milk for a delightful combination.
Recipe Variations
Feel free to customize your Golden Graham Chocolate Bars by adding in your favorite mix-ins. Consider using dried fruits, such as cranberries or raisins, or swap out the nuts for seeds to cater to dietary preferences.