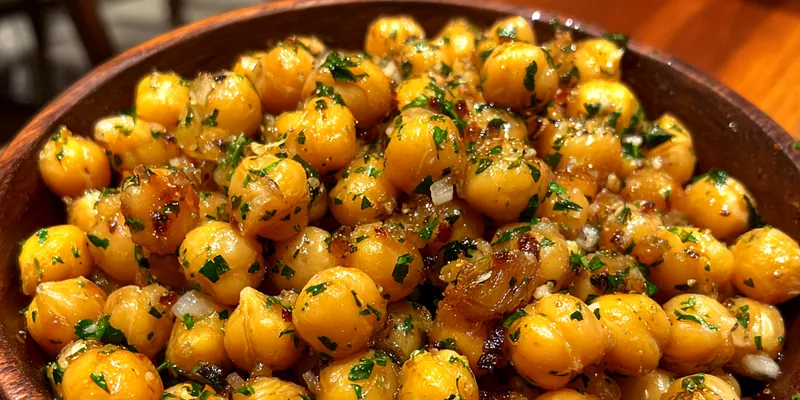
Crispy Garlic Herb Chickpeas
Crispy Garlic Herb Chickpeas are your new go-to snack that combines health and flavor in every bite. This recipe is easy to follow and results in perfectly crunchy chickpeas, making them a delightful addition to any meal. With a blend of garlic and herbs, they are not only tasty but also packed with nutrition. Perfect for munching on their own or adding to salads for a satisfying crunch.

Why This Crispy Garlic Herb Chickpeas Recipe Works
This recipe stands out due to its simplicity and the ability to create a healthy snack in under 30 minutes. The use of chickpeas not only provides a satisfying crunch but also packs a protein punch. The combination of garlic and herbs infuses the chickpeas with robust flavor, making them hard to resist. This method of baking ensures a crispy texture without the need for frying.
The flavor profile is a delightful mix of savory garlic, earthy herbs, and a hint of smokiness from paprika. The baking method allows for even crisping, ensuring every bite is delightful. Plus, they can be customized easily with various spices to suit your taste preferences.
💡 Professional Tip
For the crispiest chickpeas, ensure they are thoroughly dried after rinsing. You can also experiment with different spices like cayenne or cumin for added flavor.
Frequently Asked Questions
Yes, you can prepare the chickpeas and season them ahead of time, then bake them just before serving for maximum crunch. Store them in an airtight container at room temperature for up to 2 days after baking.
You can use avocado oil or melted coconut oil as alternatives to olive oil. Both options will provide a different flavor while keeping the chickpeas healthy.
Baking is the best method to achieve a crispy texture without excess oil. You can also air fry them for a shorter cooking time while still achieving that delicious crunch.
To prevent sogginess, ensure that the chickpeas are completely dried after rinsing and before seasoning. Avoid overcrowding on the baking sheet to allow for proper air circulation.
The chickpeas should be golden brown and crispy. If they feel slightly soft after baking, give them a few more minutes in the oven until they reach the desired texture.
These chickpeas are excellent on their own as a snack or can be added to salads, grain bowls, or served alongside dips like hummus. They also make a great topping for soups.
Absolutely! Add a dash of cayenne pepper or chili powder to the seasoning mixture for a spicy kick. Adjust the amount to your preferred heat level.
Store any leftover chickpeas in an airtight container at room temperature. To re-crisp them, bake in a preheated oven at 350°F (175°C) for 5-10 minutes.
Recipe Troubleshooting Guide
Chickpeas Are Not Crispy
Problem: If the chickpeas come out soft or chewy.
Solution: Make sure to dry the chickpeas thoroughly after rinsing and before seasoning. Baking them at the right temperature is also crucial for achieving crispiness.
Uneven Cooking
Problem: Chickpeas are browning unevenly.
Solution: Ensure chickpeas are spread out in a single layer on the baking sheet. Shake the pan halfway through baking to promote even cooking.
Flavor Is Too Mild
Problem: Chickpeas lack flavor or seasoning.
Prevention: Increase the amount of spices used or add an additional layer of seasoning after baking for extra flavor enhancement.
Baking Time Is Too Long
Problem: Chickpeas are burnt or overly dry.
Recovery: Keep a close eye on them during the last few minutes of baking, as they can quickly go from perfectly crispy to burnt.
Too Much Oil
Problem: Chickpeas are greasy.
Prevention: Use less oil next time and ensure they are evenly coated to avoid greasy chickpeas while still achieving crunchiness.
Flavor Balance Issues
Too Sweet: If the chickpeas taste too sweet, add more salt or spices to balance the flavors.
Too Salty: If they are too salty, add a touch of unsalted chickpeas to dilute the flavor.
Bland: If the flavor is bland, consider adding more herbs or spices to enhance the taste.
Choosing the Best Ingredients for Crispy Garlic Herb Chickpeas
Quality ingredients are key to elevating this dish. Look for fresh chickpeas, preferably organic, to ensure the best flavor and texture. Fresh spices can also make a significant difference in taste, so check your pantry.
Preparation is just as important as ingredient selection. Make sure your chickpeas are well-drained and dried to achieve maximum crispiness. Properly measuring spices will ensure a balanced flavor.
Essential Ingredient Notes
- Chickpeas: Chickpeas are the star ingredient here, providing both protein and fiber. Choose canned chickpeas for ease or dried ones that you soak overnight for a more authentic flavor.
- Garlic Powder: Garlic powder adds a wonderful depth of flavor. Opt for fresh garlic if you prefer a stronger taste, but remember to adjust cooking times accordingly.
- Olive Oil: Using high-quality olive oil enhances the richness of the chickpeas. It also aids in achieving that desired crispy texture while roasting.
Mastering the Cooking Technique
The secret to achieving perfectly crispy chickpeas lies in the preparation and cooking technique. Ensure your chickpeas are thoroughly dried after rinsing, as moisture will prevent them from becoming crunchy. Spreading them evenly on the baking sheet is also crucial.
Timing is essential; keep an eye on them during the last few minutes of baking. They’ll go from golden to burnt quickly. Trust your senses; look for a deep golden color and listen for that satisfying crunch when you bite into them.
The Secret to Perfect Crispy Garlic Herb Chickpeas
The most important technique for this recipe is drying the chickpeas thoroughly before baking. This simple step will ensure they crisp up beautifully in the oven.
Crispy Garlic Herb Chickpeas
📋 Ingredients
Seasonings
- 2 tablespoons olive oilFor sautéing and flavor
- 1 teaspoon garlic powderAdds aromatic depth
- 1 teaspoon paprikaFor a smoky finish
- 1 teaspoon dried oreganoEnhances flavor
- 1 teaspoon onion powderAdds sweetness and depth
Main Ingredients
- 1 can (15 oz) chickpeas, drained and rinsedThe base ingredient for crunch
- 2 tablespoons olive oilTo help achieve crispiness
- 1 teaspoon garlic powderAdds aromatic depth
- 1 teaspoon paprikaFor a smoky finish
- 1 teaspoon dried oreganoEnhances flavor
- 1 teaspoon onion powderAdds sweetness and depth
- Salt and pepper to tasteTo adjust seasoning
Instructions
Preheat the Oven
Set your oven to 400°F (200°C) to preheat while you prepare the chickpeas.
Prepare the Chickpeas
Drain and rinse the chickpeas thoroughly. Pat them dry with paper towels to remove excess moisture.
Season the Chickpeas
In a mixing bowl, combine the chickpeas with olive oil, garlic powder, paprika, oregano, onion powder, salt, and pepper. Toss until evenly coated.
Spread on a Baking Sheet
Spread the seasoned chickpeas in a single layer on a baking sheet lined with parchment paper.
Bake the Chickpeas
Bake in the preheated oven for 20-25 minutes, shaking the pan halfway through to ensure even cooking.
Check for Crispiness
Remove from the oven when golden and crispy. Allow them to cool slightly before serving.
Serve and Enjoy
Enjoy the crispy garlic herb chickpeas as a snack or toss them in salads for added crunch.
Recipe Notes & Tips
Make-Ahead Instructions
You can prepare the chickpeas and season them ahead of time, then bake them just before serving for maximum crunch. Store them in an airtight container at room temperature for up to 2 days after baking.
Serving Suggestions
These chickpeas are excellent on their own as a snack or can be added to salads, grain bowls, or served alongside dips like hummus. They also make a great topping for soups.
Recipe Variations
Experiment with different spices or herbs to customize the flavor of your chickpeas. Consider adding nutritional yeast for a cheesy flavor without dairy.