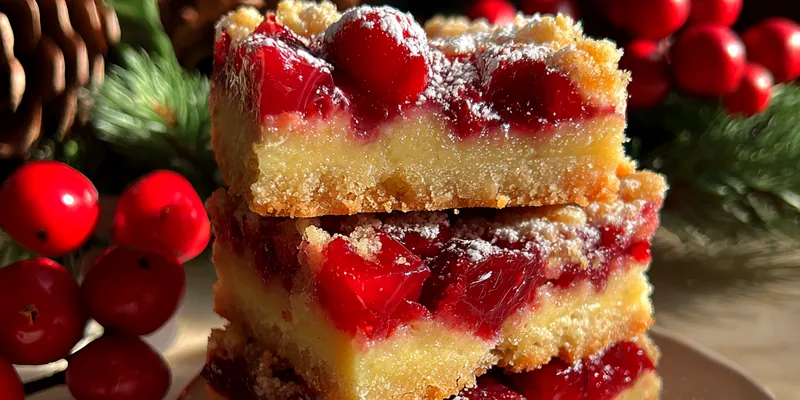
Festive Cherry Dessert Bars
These Festive Cherry Dessert Bars are a delightful treat that combines sweet cherries with a buttery crust. Perfect for holiday gatherings, these bars are easy to prepare and sure to impress your guests. With a balance of flavors and textures, they are a crowd favorite. Enjoy them warm or cold!

Why This Festive Cherry Dessert Bars Recipe Works
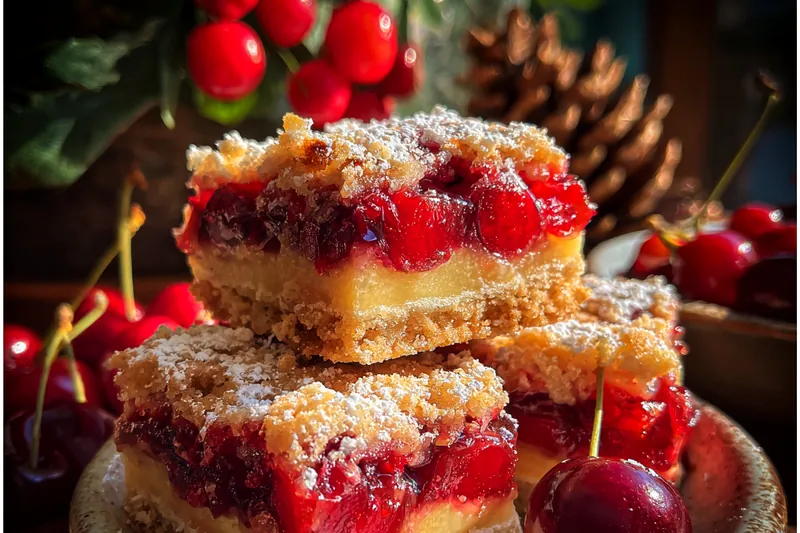
This recipe combines fresh cherries with a simple buttery crust, creating a perfect balance of sweetness and tartness. The addition of oats gives the bars a delightful texture, while the aroma of vanilla and almond elevates the overall flavor. The festive appearance makes them ideal for celebrations.
The technique of layering the crust and the filling ensures that each bite is packed with flavor. Baking until golden brown gives the bars a satisfying crunch on top while keeping the center moist and delicious. This recipe is straightforward and yields impressive results, making it a must-try for any home baker.
💡 Professional Tip
For the best results, use fresh cherries if possible, as they provide a superior flavor compared to canned ones. Make sure to pit the cherries thoroughly to avoid any unpleasant surprises while enjoying your dessert. Allow the bars to cool completely before slicing to ensure clean edges.
Frequently Asked Questions
Absolutely! You can prepare these bars a day in advance. Just store them in an airtight container at room temperature. This allows the flavors to meld together, enhancing the taste. If you need to store them longer, refrigerate for up to a week, but they are best enjoyed fresh.
If fresh cherries are not available, you can use frozen cherries or canned cherry pie filling as substitutes. Make sure to drain any excess liquid from canned cherries to avoid soggy bars. Adjust the sugar content based on the sweetness of the filling you use to maintain the right flavor balance.
The bars are done when the top is golden brown and a toothpick inserted into the center comes out clean, with just a few crumbs attached. Keep an eye on them towards the end of the baking time to avoid overcooking. If the edges start to darken too quickly, you can cover them with foil for the last few minutes of baking.
Yes, these bars freeze well! Allow them to cool completely, then wrap them tightly in plastic wrap or aluminum foil and place them in an airtight container. They can be frozen for up to three months. When ready to enjoy, simply thaw them in the refrigerator overnight before serving.
These bars pair beautifully with a scoop of vanilla ice cream or a dollop of whipped cream for added indulgence. A sprinkle of chopped nuts or a drizzle of chocolate sauce can also elevate the presentation. Enjoy them with a cup of coffee or tea for the perfect afternoon treat.
Stored in an airtight container, these bars will last about a week in the fridge. To maintain their freshness, keep them sealed and ideally consume them within the first few days. Reheat them slightly in the microwave if you prefer them warm.
Yes, making them in advance is a great idea, especially for holiday gatherings. You can prepare them the day before and store them at room temperature or refrigerate them. Just remember to dust with powdered sugar just before serving for an extra festive touch.
To reheat the bars, place them in the microwave for 10-15 seconds until warm. Alternatively, you can reheat them in an oven preheated to 350°F (175°C) for about 5-10 minutes. Just be sure to cover them with foil to prevent the crust from getting too hard.
Recipe Troubleshooting Guide
Too Dry
Problem: If your dessert bars are dry, it could be due to overbaking or too much flour.
Solution: Ensure you follow the baking time accurately and check for doneness a few minutes before the time is up. If the mixture is too dry, try reducing the flour slightly in the next batch.
Not Crispy Enough
Problem: If the crust is chewy rather than crispy, it may be due to underbaking or not using enough butter.
Solution: Make sure to bake until golden brown and consider adding a bit more butter to enhance the crispiness in your next attempt.
Overcooked
Problem: Overcooked bars can become hard and lose their desirable texture.
Prevention: Monitor the baking closely and remove them from the oven once they turn golden. You can reduce the baking time slightly for a softer texture next time.
Undercooked Center
Problem: An undercooked center can lead to a gooey texture that detracts from the overall quality.
Recovery: If this happens, return the bars to the oven for a few extra minutes. Cover them with foil to prevent the crust from burning while the center finishes baking.
Burnt Exterior
Problem: If the edges of the bars are burnt, it can ruin the flavor and presentation.
Prevention: To prevent this, keep an eye on the edges during baking and cover them with foil if they start to darken too quickly.
Flavor Balance
Too Sweet: If the bars are too sweet, consider adding a bit of lemon juice or zest next time for brightness.
Too Salty: If they taste too salty, try reducing the salt in the crust by half in your next batch.
Bland: If the bars are bland, you can enhance the flavor with more vanilla or almond extract in future recipes.
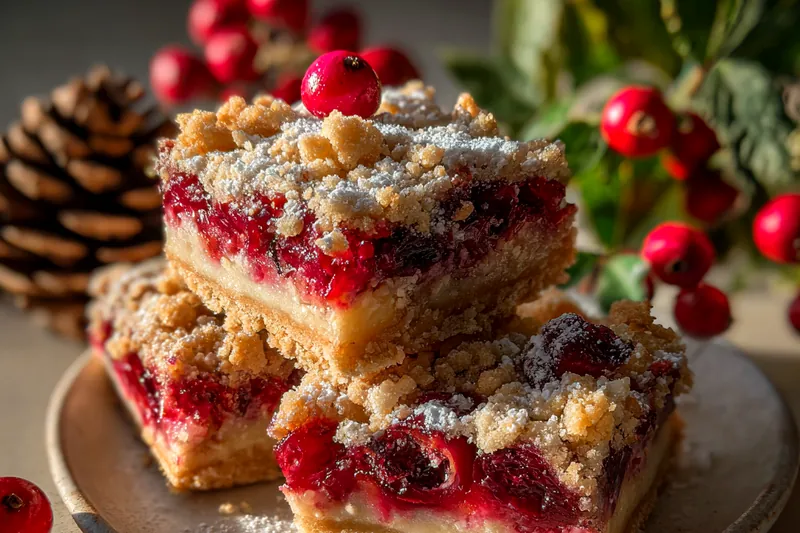
Essential Ingredients for Festive Cherry Dessert Bars
Key ingredients for this recipe include fresh cherries, which provide a burst of sweetness and natural flavor. The combination of butter and oats creates a rich and satisfying crust that holds everything together. Make sure to use high-quality vanilla and almond extracts for the best flavor.
Using fresh, ripe cherries is essential for achieving the best taste in these bars. If you opt for frozen or canned cherries, ensure they are well-drained and not overly sweetened. The quality of your butter and flour also plays a significant role in the overall texture and flavor of the finished product.
Essential Ingredient Notes
- Fresh Cherries: Choose ripe, sweet cherries for the best flavor. Look for cherries that are firm and have a vibrant color. If possible, buy them in season for maximum freshness.
- Unsalted Butter: Using unsalted butter gives you control over the salt content in your recipe. Make sure it's at room temperature for easy mixing and a smooth texture.
- Rolled Oats: Opt for old-fashioned rolled oats which provide a better texture than quick oats. They help create a chewy crust that perfectly complements the cherry filling.
Step-by-Step Cooking Process
The cooking process for these dessert bars is straightforward and involves combining the ingredients in a few simple steps. Begin by preparing the cherry filling, then make the crust mixture before layering them together. The baking process brings all the flavors together beautifully.
To achieve perfect results, be sure to let the bars cool completely before slicing. This helps the layers set nicely, making it easier to cut clean squares. Enjoy the process and don’t rush; the rewards are delicious bars ready to impress!
Key Technique for Perfect Festive Cherry Dessert Bars
The key to perfect Festive Cherry Dessert Bars is in the layering technique. Press the crust firmly into the pan to create a solid base, and don’t skip on the cooling time after baking. This will ensure your bars hold their shape when cut and provide a delightful contrast between the crunchy topping and the juicy cherry filling.
Festive Cherry Dessert Bars
📋 Ingredients
Main Ingredients
- 1 cup butterRoom temperature
- 1 cup sugarGranulated
- 1/4 cup brown sugarPacked
- 1/2 cup cherry juiceFrom cooked cherries
- 1 tbsp cornstarchFor thickening
For the Sauce
- 1 lb fresh cherriesPitted
- 1 cup granulated sugarFor filling
- 2 cups all-purpose flourFor crust
- 1 cup rolled oatsFor crust
- 1 cup unsalted butterSoftened
- 1 tsp baking powderFor leavening
- 1/2 tsp saltFor flavor
- 2 large eggsAt room temperature
Instructions
Prepare the Cherry Filling
In a saucepan, combine the pitted cherries, granulated sugar, lemon juice, and almond extract. Cook over medium heat until the cherries soften and release their juices.
Make the Crust
In a large bowl, cream together the softened butter, brown sugar, and vanilla extract until smooth. Add eggs one at a time, mixing well after each addition.
Combine Dry Ingredients
In another bowl, whisk together the flour, oats, baking powder, and salt. Gradually add the dry ingredients to the creamed mixture until well combined.
Assemble the Bars
Preheat your oven to 350°F (175°C). Grease a 9x13 inch baking dish. Press half of the crust mixture into the bottom of the prepared dish.
Add the Cherry Filling
Spread the cherry filling evenly over the crust. Sprinkle the remaining crust mixture on top.
Bake the Bars
Bake in the preheated oven for 45 minutes, or until the top is golden brown.
Cool and Slice
Allow the bars to cool completely in the baking dish before slicing into squares.
Serve
Dust the bars with powdered sugar before serving for an extra festive touch.
Recipe Notes & Tips
Storage Tips
Store any leftover bars in an airtight container at room temperature for up to a week. For longer storage, refrigerate them. Ensure they are completely cool before sealing to maintain freshness.
Serving Suggestions
Serve these bars warm with a scoop of vanilla ice cream or chilled with a dollop of whipped cream. They also pair well with coffee or tea, making them a great addition to any gathering.
Recipe Variations
Feel free to experiment by adding different fruits like blueberries or raspberries for a fruity twist. You can also add spices like cinnamon or nutmeg to the crust for added flavor.