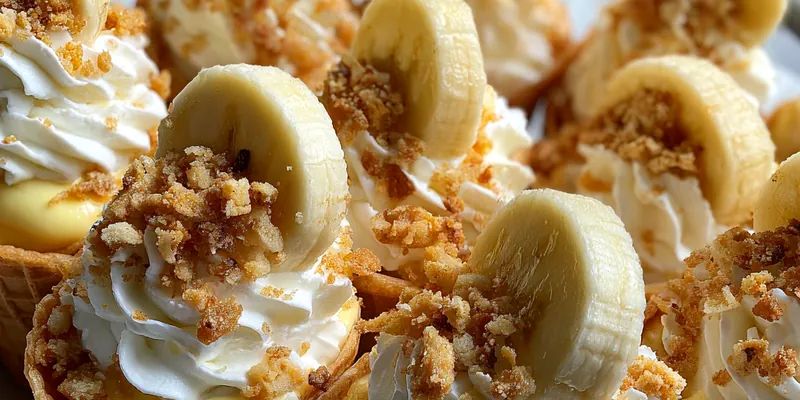
Banana Pudding Cheesecake Cones
Banana Pudding Cheesecake Cones are an innovative twist on classic banana pudding and cheesecake. Perfect for parties or a sweet treat at home, these cones are fun to eat and loaded with flavor. With layers of creamy cheesecake, luscious banana pudding, and crunchy vanilla wafers, they offer a delightful combination of textures. This dessert is sure to impress guests and satisfy your sweet tooth!

Why This Banana Pudding Cheesecake Cones Recipe Works
This recipe works beautifully because it combines the rich flavors of cheesecake with the light, creamy texture of banana pudding. The sugar cones add a satisfying crunch, making each bite a delightful experience. The layers not only make it visually appealing but also enhance the flavor with every scoop. It's a fun and portable way to enjoy a classic dessert.
Using high-quality ingredients is key to achieving the best results. The fresh bananas and creamy cheesecake are the stars of this dessert. The technique of layering the ingredients allows for the perfect balance of flavors and textures. Each cone is a masterpiece that brings together the best of both worlds.
💡 Professional Tip
For the best flavor, use ripe bananas and high-quality cream cheese. Make sure to chill the cones sufficiently before serving to allow the flavors to meld beautifully. If you're short on time, you can prepare the cheesecake mixture and banana pudding a day in advance, saving you time on the day of serving.
Frequently Asked Questions
Yes, you can prepare the cheesecake mixture and banana pudding in advance. However, it's best to assemble the cones no more than a few hours before serving to ensure the cones remain crunchy and the bananas do not brown too much. Store the fillings in the refrigerator until you're ready to assemble.
If you cannot find instant banana pudding, you can use vanilla pudding mix and add mashed ripe bananas for flavor. Alternatively, you can make homemade banana pudding from scratch, which will also work well in this recipe. Just be sure to adjust the consistency to match that of instant pudding for layering.
Since this is a no-bake dessert, the key is ensuring the cheesecake mixture is well combined and creamy. Assembling the cones and chilling them allows the flavors to meld together, so make sure to chill them for at least 30 minutes before serving for the best taste.
While you can freeze the cheesecake and banana pudding mixtures separately, it's not recommended to freeze the assembled cones. Freezing may cause the cones to become soggy upon thawing. If you must freeze, store the fillings in airtight containers and assemble the cones fresh when ready to serve.
These cones are delicious on their own, but you can serve them with additional fruit, like fresh strawberries or raspberries, for a pop of color and flavor. A drizzle of chocolate sauce or caramel can also enhance the dessert experience. Pairing with a scoop of vanilla ice cream is another delightful option.
Assembled Banana Pudding Cheesecake Cones are best enjoyed within a day or two. If stored properly in the refrigerator, the cones can last up to 3 days, but the texture may change as the cones absorb moisture from the fillings. It's best to consume them fresh.
Yes, you can prepare the components in advance. The cheesecake mixture and banana pudding can be made a day ahead and stored in the refrigerator. Assemble the cones shortly before serving to maintain the integrity of the cones and freshness of the bananas.
These cones are best served chilled and do not require reheating. If you've stored them in the fridge, simply take them out and serve them as is. If you need to soften the fillings, allow them to sit at room temperature for a few minutes before serving.
Recipe Troubleshooting Guide
Too Dry
Problem: The cheesecake filling is too thick and lacks moisture.
Solution: To fix this, you can add a little more heavy cream to the cheesecake mixture to achieve a smoother consistency. Whip the cream lightly before folding it in to avoid overmixing.
Not Crispy Enough
Problem: The cones have become soggy or lose their crunch.
Solution: Make sure to assemble the cones just before serving. If they must be assembled in advance, consider brushing the inside of the cones with melted chocolate to create a barrier against moisture.
Overcooked
Problem: The cheesecake filling has curdled or become grainy.
Prevention: To prevent this, ensure that you are mixing the cream cheese at room temperature until smooth. Avoid overworking the mixture and be careful not to overheat if you're using any heat during preparation.
Undercooked Center
Problem: The pudding hasn't set properly.
Recovery: If the pudding seems too runny, allow it to chill longer in the refrigerator. Ensure that the proportions of milk to pudding mix are correct, and allow enough time for it to set in the fridge before using.
Burnt Exterior
Problem: If you baked the cones, they ended up burnt.
Prevention: To prevent burning, keep a close eye on the cones while baking. Use a lower oven temperature and check for doneness earlier than the recipe suggests.
Flavor Balance
Too Sweet: If the dessert is too sweet, you can add a touch of sour cream to the filling to balance the sweetness.
Too Salty: If it's too salty, doubling the recipe can help balance out the saltiness.
Bland: If the flavors are bland, consider adding a splash of lemon juice or vanilla extract to enhance the taste.
Essential Ingredients for Banana Pudding Cheesecake Cones
The key ingredients for this dessert include ripe bananas, creamy cream cheese, and vanilla pudding mix. Ripe bananas provide natural sweetness and flavor, while cream cheese adds richness. Vanilla wafers give a satisfying crunch that complements the creamy fillings. Using high-quality ingredients will enhance the overall taste of the cones.
When selecting bananas, look for ones that are ripe but not overripe for the best flavor. The cream cheese should be at room temperature to mix smoothly with the other ingredients. Choose a good-quality vanilla pudding mix to ensure the pudding has the desired consistency and flavor.
Essential Ingredient Notes
- Cream Cheese: Use full-fat cream cheese for the richest flavor and best texture. Ensure it is softened fully to room temperature before mixing for a smooth consistency.
- Bananas: Ripe bananas are essential for the best flavor. Look for bananas that have a few brown spots, as they are sweeter and more flavorful.
- Vanilla Wafers: Using crushed vanilla wafers adds a delightful crunch. Opt for a brand that uses real vanilla for enhanced flavor in your dessert.
Step-by-Step Cooking Process
The cooking process for Banana Pudding Cheesecake Cones is straightforward and fun. Begin by preparing the cheesecake mixture and banana pudding separately. Once both are ready, the assembly of the cones is where the creativity comes in. Layering the ingredients allows for an aesthetically pleasing presentation.
To achieve perfect results, make sure to whip the cream to stiff peaks before folding it into the cheesecake mixture. This creates a light and airy texture. Chilling the assembled cones is essential for the flavors to meld and the pudding to set properly.
Key Technique for Perfect Banana Pudding Cheesecake Cones
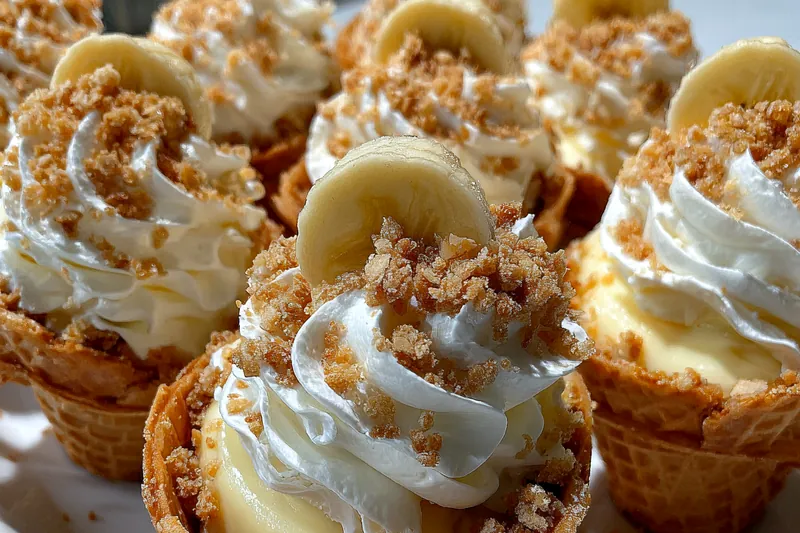
The key technique in this recipe is the layering method. For the best flavor and texture, layer the ingredients carefully in the cones, starting with the crunchy vanilla wafers, followed by the cheesecake mixture and banana pudding. This method not only looks appealing but also ensures a delightful mix of flavors in every bite.
Banana Pudding Cheesecake Cones
📋 Ingredients
Main Ingredients
- 1 cup butterRoom temperature
- 1 cup brown sugarPacked
- 1/4 cup heavy creamFor drizzling
- 1 teaspoon vanilla extractFor flavor
- Pinch of saltTo balance sweetness
For the Sauce
- 2 cups cream cheeseSoftened
- 1 cup powdered sugarFor sweetness
- 1 teaspoon vanilla extractFor flavor
- 1 cup heavy whipping creamFor whipping
- 1 box instant banana pudding mixFor the pudding layer
- 2 cups milkFor pudding preparation
- 3 ripe bananasSliced
- 12 sugar conesFor serving
- 1 cup crushed vanilla wafersFor layering
- 1/4 cup chopped pecansOptional topping
- Whipped creamFor topping
- Chocolate shavingsFor garnish
Instructions
Prepare Ingredients
Gather all ingredients and ensure that the cream cheese is softened for easy mixing.
Make Cheesecake Mixture
In a bowl, beat the softened cream cheese until smooth. Gradually add in powdered sugar and vanilla extract, mixing until fully combined.
Whip Cream
In another bowl, whip the heavy cream until stiff peaks form. Carefully fold the whipped cream into the cheesecake mixture until well combined.
Prepare Banana Pudding
In a separate bowl, mix the banana pudding mix with milk according to package instructions. Fold in the sliced bananas once it thickens.
Layer Ingredients in Cones
In each sugar cone, add a layer of crushed vanilla wafers, followed by a layer of the cheesecake mixture, then a layer of banana pudding.
Continue Layering
Repeat the layering process until the cones are filled, finishing with a layer of whipped cream on top.
Garnish
Top the cones with chocolate shavings and chopped pecans, if desired.
Chill and Serve
Place the assembled cones in the refrigerator for at least 30 minutes before serving to allow flavors to meld.
Recipe Notes & Tips
Storage Tips
Store any leftover Banana Pudding Cheesecake Cones in an airtight container in the refrigerator. They are best enjoyed fresh, but if stored properly, they can last up to 3 days. Keep in mind that the cones may become softer over time.
Serving Suggestions
These cones are perfect on their own, but you can enhance the experience by serving them with additional fresh fruit, chocolate sauce, or a scoop of vanilla ice cream. A sprinkle of cinnamon on top can also elevate the flavors.
Recipe Variations
Feel free to experiment with different flavors by using different pudding mixes, such as vanilla or chocolate. You can also add layers of other fruits like strawberries or blueberries for an extra fruity twist.